No edit summary Tag: sourceedit |
(No reason to remove those links.) Tag: Source edit |
||
| (9 intermediate revisions by 5 users not shown) | |||
| Line 12: | Line 12: | ||
CITY is divided into [[Light Fang]]'s SunshineCITY and [[Night Crow]]'s DarkmoonCITY. Each area has an office, plaza, square, and hall named for whichever half of CITY it is in. Each tamer also has a Tamer Home where he or she (in addition to living there) can access his or her farm island and digivolve Digimon. In each version, {{c|Grimmon|dsdd}} brainwashes the rival's team and takes over their portion of CITY. "[[The Final Battle]]" is one of Koh or Sayo's final quests and consists of an assault on the enemy base. In ''Dawn'', Koh infiltrates DarkmoonCITY and defeats the [[Chrono Core]]-possessed {{c|ChaosGallantmon C|dsda}}, while in ''Dusk'' Sayo infiltrates SunshineCITY and defeats the Chrono Core-possessed {{c|Ophanimon C|dsdu}}. |
CITY is divided into [[Light Fang]]'s SunshineCITY and [[Night Crow]]'s DarkmoonCITY. Each area has an office, plaza, square, and hall named for whichever half of CITY it is in. Each tamer also has a Tamer Home where he or she (in addition to living there) can access his or her farm island and digivolve Digimon. In each version, {{c|Grimmon|dsdd}} brainwashes the rival's team and takes over their portion of CITY. "[[The Final Battle]]" is one of Koh or Sayo's final quests and consists of an assault on the enemy base. In ''Dawn'', Koh infiltrates DarkmoonCITY and defeats the [[Chrono Core]]-possessed {{c|ChaosGallantmon C|dsda}}, while in ''Dusk'' Sayo infiltrates SunshineCITY and defeats the Chrono Core-possessed {{c|Ophanimon C|dsdu}}. |
||
| − | During the "[[The Final Battle]]" quest, SunshineCITY is inhabited by wild [[Angemon]], [[Cyberdramon]], [[Diatrymon]], [[Kokatorimon]], [[MetalGreymon (Vaccine)]], [[SlashAngemon]], and [[Zudomon]] in ''Dusk'', while DarkmoonCITY is inhabited by wild {{c|BishopChessmon|White}}, [[Devidramon]], [[Ebemon]] [[Leomon]], [[Myotismon]], [[Ogremon]], [[Okuwamon]], {{c|RookChessmon|Black}}, and [[Sunflowmon]] in ''Dawn''. |
+ | During the "[[The Final Battle]]" quest, SunshineCITY is inhabited by wild [[Angemon]], [[Cyberdramon]], [[Diatrymon]], [[Kokatorimon]], [[MetalGreymon (Vaccine)]], [[SlashAngemon]], and [[Zudomon]] in ''Dusk'', while DarkmoonCITY is inhabited by wild {{c|BishopChessmon|White}}, [[Devidramon]], [[Ebemon]], [[Leomon]], [[Myotismon]], [[Ogremon]], [[Okuwamon]], {{c|RookChessmon|Black}}, and [[Sunflowmon]] in ''Dawn''. |
{{-}} |
{{-}} |
||
| Line 27: | Line 27: | ||
In ''[[Digimon Story: Lost Evolution]]'', it is connected to [[West City]]. |
In ''[[Digimon Story: Lost Evolution]]'', it is connected to [[West City]]. |
||
| − | {{tab|o}}{{tab|Data}} |
+ | {{tab|o|560px}}{{tab|Data}} |
{{tab|c}}{{tab|Digimon}} |
{{tab|c}}{{tab|Digimon}} |
||
{{catch/header}} |
{{catch/header}} |
||
| − | {{catch/entry|Icemon|yes|yes||39|70|Aq |
+ | {{catch/entry|Icemon|yes|yes||39|70|Aq}} |
| − | {{catch/entry|Mojyamon|yes|yes||39|73|Aq |
+ | {{catch/entry|Mojyamon|yes|yes||39|73|Aq}} |
| − | {{catch/entry|Frigimon|yes|yes||40|71|Aq |
+ | {{catch/entry|Frigimon|yes|yes||40|71|Aq}} |
| − | {{catch/entry|Garurumon|yes|yes||40|76|Be |
+ | {{catch/entry|Garurumon|yes|yes||40|76|Be}} |
| − | {{catch/entry|Hyogamon|yes|yes||41|74|Aq |
+ | {{catch/entry|Hyogamon|yes|yes||41|74|Aq}} |
| − | {{catch/entry|Angemon|yes|yes||41|75|Ho |
+ | {{catch/entry|Angemon|yes|yes||41|75|Ho}} |
| − | {{catch/entry|Reptiledramon|yes|yes||42|71|Dr |
+ | {{catch/entry|Reptiledramon|yes|yes||42|71|Dr}} |
| − | {{catch/entry|IceDevimon|yes|yes||43|75|Aq |
+ | {{catch/entry|IceDevimon|yes|yes||43|75|Aq}} |
| − | {{catch/entry|Megadramon|yes|yes||44|141|Ma |
+ | {{catch/entry|Megadramon|yes|yes||44|141|Ma}} |
| − | {{catch/entry|Mammothmon|yes|yes||45|145|Be |
+ | {{catch/entry|Mammothmon|yes|yes||45|145|Be}} |
| − | {{catch/entry|Zudomon|yes|yes||45|159|Aq |
+ | {{catch/entry|Zudomon|yes|yes||45|159|Aq}} |
| − | {{catch/entry|Cyberdramon|yes|yes||46|151|Dr |
+ | {{catch/entry|Cyberdramon|yes|yes||46|151|Dr}} |
| − | {{catch/entry|MameTyramon|yes|yes|{{quest|Stop the Duel|Ho|07|Da|07}}|48|185|Ma |
+ | {{catch/entry|MameTyramon|yes|yes|{{quest|Stop the Duel|Ho|07|Da|07}}|48|185|Ma}} |
| − | {{catch/entry|MetalTyrannomon|yes|yes|{{quest|Stop the Duel|Ho|07|Da|07}}|48|187|Aq |
+ | {{catch/entry|MetalTyrannomon|yes|yes|{{quest|Stop the Duel|Ho|07|Da|07}}|48|187|Aq}} |
| − | {{catch/entry|Vikemon|yes|yes|{{quest|The Combat Game|Aq|07|Ma|07}}|54|297|Aq |
+ | {{catch/entry|Vikemon|yes|yes|{{quest|The Combat Game|Aq|07|Ma|07}}|54|297|Aq}} |
{{catch/entry|Dark Dramon|yes|no|{{quest|Gaia Origin Challenge|U|11|U|11}}|70|4000|Dr|Speed Chip γ}} |
{{catch/entry|Dark Dramon|yes|no|{{quest|Gaia Origin Challenge|U|11|U|11}}|70|4000|Dr|Speed Chip γ}} |
||
{{catch/footer}} |
{{catch/footer}} |
||
| Line 68: | Line 68: | ||
Glacier at this point. You can choose either one, but since you are close to |
Glacier at this point. You can choose either one, but since you are close to |
||
the one near FriendshipDE, enter that one. Go in to Macro Sea, follow the path |
the one near FriendshipDE, enter that one. Go in to Macro Sea, follow the path |
||
| − | until you see another tower. Go around and go lower right. Upper left, and |
+ | until you see another tower. Go around and go lower right. Upper left, and |
then through the open door. Follow the only path to the tower. |
then through the open door. Follow the only path to the tower. |
||
When you exit back to Access Glacier, you find Sayo facing Grimmon and bunch |
When you exit back to Access Glacier, you find Sayo facing Grimmon and bunch |
||
of members that are under some dark effect. Soon Sayo falls under the power as |
of members that are under some dark effect. Soon Sayo falls under the power as |
||
| − | well. You face Grimmon but you fail too. But you rise up, and save Sayo. |
+ | well. You face Grimmon but you fail too. But you rise up, and save Sayo. |
| − | Virused Ophanimon attacks you. I had a hard time fighting this because my |
+ | Virused Ophanimon attacks you. I had a hard time fighting this because my |
strongest Digimon was also Ophanimon, full of Holy skills. |
strongest Digimon was also Ophanimon, full of Holy skills. |
||
After defeating Ophanimon, it and chief come to their senses and take everyone |
After defeating Ophanimon, it and chief come to their senses and take everyone |
||
to analyze. Treasure chest on the left contains a healing item if you want to |
to analyze. Treasure chest on the left contains a healing item if you want to |
||
| − | collect it. |
+ | collect it. |
| − | Go back to union room. Shine N Area is restored by creating vaccine from |
+ | Go back to union room. Shine N Area is restored by creating vaccine from |
attacked members. Sayo will stay for a while. Collect the reward to end the |
attacked members. Sayo will stay for a while. Collect the reward to end the |
||
quest. |
quest. |
||
| Line 91: | Line 91: | ||
Digimons hard on the farm. In fact, farm is the only way to raise resistance |
Digimons hard on the farm. In fact, farm is the only way to raise resistance |
||
of Digimons. Maximum is 1100 and it doesn't mean immune. |
of Digimons. Maximum is 1100 and it doesn't mean immune. |
||
| − | |||
| − | |||
Holy Species Quest: Stop the Duel |
Holy Species Quest: Stop the Duel |
||
| − | + | In order to unlock this quest, you need to have a Monzaemon with "Lazy" |
|
| − | + | personality in one of your farms. You can scan a Kumamon at Chip Forest, |
|
| − | + | Digivolve into Grizzmon, level it up then save. Digivolve into Monzaemon and |
|
| − | + | see if it has Lazy personality. If not, reset and retry. |
|
| − | + | Talk to Monzaemon in the farm. Monzaemon wants to stop his friends from |
|
| − | + | duelling but it's too lazy to go itself. Head to Access Glacier. |
|
| − | + | Go through the only path. Go into the black portal. Exit via the black |
|
| − | + | portal in the same screen. Follow the second right path to the next map. |
|
| − | + | Head to the bottom bath and you'll find Mamedramon. Talk to it and it'll |
|
| − | + | attack you. After defeating it, it'll stop. But you have to convince |
|
| − | + | METyrannomn to stop as well. Head right, you'll find METyrannomon. Talk to |
|
| − | + | it and then obvious result. It wants you to get a Courage Sign from |
|
| − | + | IPDramonDM in CITY. |
|
| − | + | You can find IPDramonDM in Shine S Area. Get the Courage Sign and back to |
|
| − | + | MameTyramon. Talk to Monzaemon in the farm and collect reward to finish the |
|
| − | + | quest. |
|
Aquan Species Quest: The Combat Game |
Aquan Species Quest: The Combat Game |
||
| − | + | Talk to Hyogamon in Shine Office. Hyogamon is fan of Vikemon in Access |
|
| − | + | Glacier. Enter their combat game. |
|
| − | + | Go to Access Glacier and talk to Vikemon. You need to fight 3 Zudomons to |
|
| − | + | win. Go to the next map to fight the first one. You receive Ice Stone after |
|
| − | + | defeating it. Go to the next map. Choose the second left road to fight the |
|
| − | + | second Zudomon. You get a Frozen Stone. |
|
| − | + | Go to the left path and into the black portal. Go left up to enter the black |
|
| − | + | portal to exit. Go to upper right path to find the third Zudomon. You get |
|
| − | + | Snow Stone. Go back to previous screen, up the ladders and into the pipe. |
|
| − | + | Retrack the path you've gone through in Search the DigiArea quest. I hate |
|
| − | + | Access Glacier because of this. |
|
| − | + | Talk to Vikemon and you get attacked. Vikemon is full of HP considering its |
|
| − | + | level. After defeating it, you win the game. Talk to Hyogamon and collect the |
|
| − | + | reward. |
|
| − | |||
We get access to Access Glacier ( dumb translation i know).Bring your aqua |
We get access to Access Glacier ( dumb translation i know).Bring your aqua |
||
digimon for exp and head over. |
digimon for exp and head over. |
||
| − | Head up the first ladder to obtain a Digiar600T.Continue southwest to the |
+ | Head up the first ladder to obtain a Digiar600T.Continue southwest to the |
next screen.I can't seem to do anything about the boxes,so we will jsut leave |
next screen.I can't seem to do anything about the boxes,so we will jsut leave |
||
them alone for now.Head south a bit then west for DigiEgg of Friendship.If |
them alone for now.Head south a bit then west for DigiEgg of Friendship.If |
||
you head up the ladder and jump down the chute,you will end up at Macro Sea. |
you head up the ladder and jump down the chute,you will end up at Macro Sea. |
||
| − | Exit the map where you got the digiegg through the southeast.A chest with |
+ | Exit the map where you got the digiegg through the southeast.A chest with |
Digiar600S is there.move back to the screen with the DigiEgg.Southwest to the |
Digiar600S is there.move back to the screen with the DigiEgg.Southwest to the |
||
| − | next screen.Grab the chest(Digiar600D).Take the spilt path on the right to |
+ | next screen.Grab the chest(Digiar600D).Take the spilt path on the right to |
the next screen.Once there, head north, up the ladder for a Full DigiminD, |
the next screen.Once there, head north, up the ladder for a Full DigiminD, |
||
then southwest to the next screen.Take the NumbCore beta,head right, and |
then southwest to the next screen.Take the NumbCore beta,head right, and |
||
| Line 144: | Line 141: | ||
to the first screen via the Gate(Gate back to city and warp to Access Glacier |
to the first screen via the Gate(Gate back to city and warp to Access Glacier |
||
again) Since we have collected all the items in here. |
again) Since we have collected all the items in here. |
||
| − | |||
Bring your digimon that needs Holy exp. One that need loads of them. |
Bring your digimon that needs Holy exp. One that need loads of them. |
||
| Line 156: | Line 152: | ||
Down the slope, southwest into the next screen.Head right at the split path, |
Down the slope, southwest into the next screen.Head right at the split path, |
||
proceed to next screen via southwest again.Take the left path, move northwest. |
proceed to next screen via southwest again.Take the left path, move northwest. |
||
| − | Up the slope, past the previously locked gate, northeast to next screen, |
+ | Up the slope, past the previously locked gate, northeast to next screen, |
follow the straight path to southeast,head into the pipe. |
follow the straight path to southeast,head into the pipe. |
||
| Line 162: | Line 158: | ||
Ophanimon Lvl 60 |
Ophanimon Lvl 60 |
||
Hp: 5500 ~ |
Hp: 5500 ~ |
||
| − | Exp: Holy 4240 |
+ | Exp: Holy 4240 |
(so little compared to Gaioumon) |
(so little compared to Gaioumon) |
||
Weakness: Dark |
Weakness: Dark |
||
| − | Okay we get to fight with our dear chief with a Mega level digimon, a |
+ | Okay we get to fight with our dear chief with a Mega level digimon, a |
"supposed" good guy at that.She's able to lower the spirit of three zones |
"supposed" good guy at that.She's able to lower the spirit of three zones |
||
| − | (which i have no idea what spirit does anyway),Sephiroth C(rystal) a |
+ | (which i have no idea what spirit does anyway),Sephiroth C(rystal) a |
| − | OXXXX attack ,lowers light resist, and a 4 zone attack.Simply heal when |
+ | OXXXX attack ,lowers light resist, and a 4 zone attack.Simply heal when |
needed. |
needed. |
||
Before leaving grab the Digimin400S and head back into the gate. |
Before leaving grab the Digimin400S and head back into the gate. |
||
| − | Return to the Union Room for another short convo, and you get to choose |
+ | Return to the Union Room for another short convo, and you get to choose |
whether to keep Sayo or not.I chose to keep her, if it's any different if you |
whether to keep Sayo or not.I chose to keep her, if it's any different if you |
||
chose not to keep her someone please tell me.For kicking the CHEIF'S Digimon's |
chose not to keep her someone please tell me.For kicking the CHEIF'S Digimon's |
||
| Line 180: | Line 176: | ||
Extra:With Shine North area open, get the new stuff there if you want. |
Extra:With Shine North area open, get the new stuff there if you want. |
||
| − | |||
| − | |||
Free Quest (16) - The Combat Game |
Free Quest (16) - The Combat Game |
||
| Line 209: | Line 203: | ||
Exp: Aqua 530 |
Exp: Aqua 530 |
||
Weakness: Metal |
Weakness: Metal |
||
| − | |||
Repeat. |
Repeat. |
||
Step into the black hole to grab items.Southwest into the next screen to grab |
Step into the black hole to grab items.Southwest into the next screen to grab |
||
| − | a Full Repair T.Move back northeast, then northeast again.Follow the path to |
+ | a Full Repair T.Move back northeast, then northeast again.Follow the path to |
get a Sniper Ring alpha and a Health Ring alpha.Exit the digital area via the |
get a Sniper Ring alpha and a Health Ring alpha.Exit the digital area via the |
||
black hole north of the one you enter at the centre screen.You appear at the |
black hole north of the one you enter at the centre screen.You appear at the |
||
| − | other side of the blocked area.Move into the southeast screen via the north |
+ | other side of the blocked area.Move into the southeast screen via the north |
path to find the 3rd Zudomon. |
path to find the 3rd Zudomon. |
||
| − | |||
WARNING!WARNING!WARNING! |
WARNING!WARNING!WARNING! |
||
| Line 248: | Line 240: | ||
Hyogamon again and get our reward- 160 tamer points, 11190 bits and Speed Ring |
Hyogamon again and get our reward- 160 tamer points, 11190 bits and Speed Ring |
||
gamma. |
gamma. |
||
| − | |||
======================== |
======================== |
||
| Line 278: | Line 269: | ||
Access Glacier, Marco Sea and Dark N Area will become available after this |
Access Glacier, Marco Sea and Dark N Area will become available after this |
||
quest. |
quest. |
||
| − | |||
| − | |||
アクセスひょうが |
アクセスひょうが |
||
| − | + | 入口から北→南東へ進み、アクセスSキーを入手します。 |
|
| − | + | デジポートゲートを開けておく |
|
| − | + | デジポートゲートから西→北(梯子は使わず)→西→北→南へ行き、タウンゲートを開け、ウエストシティへ |
|
| ⚫ | |||
| − | |||
| ⚫ | |||
ウェストシティ |
ウェストシティ |
||
| − | + | 街に入るとイベント発生 |
|
| − | + | 次のエリアへ進むとルモルとバトル(Lv54:ジュレイモン、Lv53:ブラキモン、Lv52:EXティラノモン) |
|
| − | + | Wリーダールーム前でアラケルとバトル(Lv59:マメモン、Lv58:メタルマメモン、Lv57:MAエンジェモン) |
|
| − | + | Wリーダールームがあるエリアの出口からアクセスひょうがへ |
|
アクセスひょうが |
アクセスひょうが |
||
| − | + | ガードテイマーがいるエリアから北西→北→南西に進み、デジポートゲートを開けておく |
|
| − | + | デジポートゲートから北へ進んだエリアの高台でBANレオモンとのバトル(Lv64:BANレオモン) |
|
| − | + | バトル後、ウエストシティへ |
|
| − | |||
| − | + | 入手アイテム:アルケニアーマー・まんたんやく×3・けいけん2000×2 |
|
ウエストシティ |
ウエストシティ |
||
| − | + | Wリーダールームへ行き、少し進むとガードテイマーとバトル(Lv61:アルゴモンUT、Lv60:ダゴモン、Lv59:ウェンディモン) |
|
| − | + | 奥へ進みフラールとバトル(Lv64:BANレオモン、Lv38:ジャスティモン、Lv35:ヴァルキリモン) |
|
| − | + | バトル後、Nシティのカギを入手。Wリーダールームがあるエリアの出口からアクセスひょうがへ |
|
| − | + | アクセスひょうが北西のプロキシアイランドへ(アクセスポートNがあるエリアから左上) |
|
http://dejimon.m-n-t.net/chart/chart5.html |
http://dejimon.m-n-t.net/chart/chart5.html |
||
| Line 487: | Line 474: | ||
====Label Forest==== |
====Label Forest==== |
||
| − | |||
====North Cave==== |
====North Cave==== |
||
The underground link between Chip Forest and Palette Amazon. |
The underground link between Chip Forest and Palette Amazon. |
||
| Line 545: | Line 531: | ||
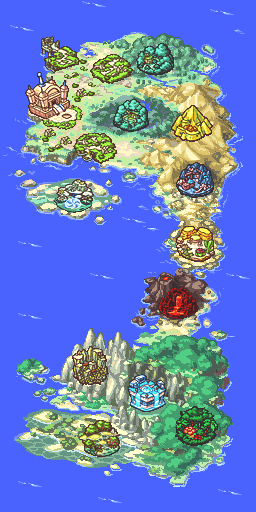
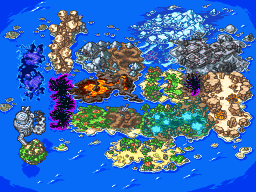
==Digimon Story: Super Xros Wars Blue and Red== |
==Digimon Story: Super Xros Wars Blue and Red== |
||
| − | [[File: |
+ | [[File:Super Xros Wars Map.png|thumb|300px|The Digital World in ''Blue'' and ''Red''.]] |
{{-}} |
{{-}} |
||
===LS-tou Zone=== |
===LS-tou Zone=== |
||
| − | The {{nihongo|'''LS-tou Zone'''|エルエストウゾーン|Eruesutou Zōn, lit. "Legend-Swords-Island Zone"}} is an area where special beings referred to as [[Legend-Arms]] inhabit. |
+ | The {{nihongo|'''[[LS-tou Zone]]'''|エルエストウゾーン|Eruesutou Zōn, lit. "Legend-Swords-Island Zone"}} is an area where special beings referred to as [[Legend-Arms]] inhabit. |
====Fort Yard==== |
====Fort Yard==== |
||
====Sky Fort==== |
====Sky Fort==== |
||
| Line 566: | Line 552: | ||
====Lost Space==== |
====Lost Space==== |
||
====Digital Space==== |
====Digital Space==== |
||
| − | |||
==See also== |
==See also== |
||
{{Worlds}} |
{{Worlds}} |
||
Revision as of 15:52, 1 November 2020
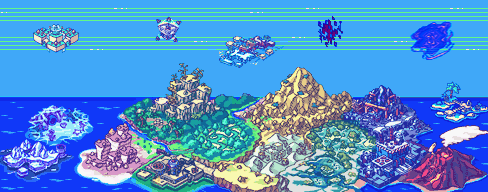
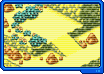
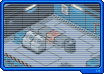
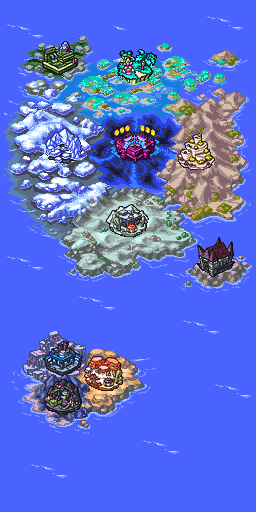
Digimon World Dawn/Dusk
The Digital World in Dawn and Dusk.
CITY
CITY is divided into Light Fang's SunshineCITY and Night Crow's DarkmoonCITY. Each area has an office, plaza, square, and hall named for whichever half of CITY it is in. Each tamer also has a Tamer Home where he or she (in addition to living there) can access his or her farm island and digivolve Digimon. In each version, Grimmon brainwashes the rival's team and takes over their portion of CITY. "The Final Battle" is one of Koh or Sayo's final quests and consists of an assault on the enemy base. In Dawn, Koh infiltrates DarkmoonCITY and defeats the Chrono Core-possessed ChaosGallantmon C, while in Dusk Sayo infiltrates SunshineCITY and defeats the Chrono Core-possessed Ophanimon C.
During the "The Final Battle" quest, SunshineCITY is inhabited by wild Angemon, Cyberdramon, Diatrymon, Kokatorimon, MetalGreymon (Vaccine), SlashAngemon, and Zudomon in Dusk, while DarkmoonCITY is inhabited by wild BishopChessmon, Devidramon, Ebemon, Leomon, Myotismon, Ogremon, Okuwamon, RookChessmon, and Sunflowmon in Dawn.
DigiColiseum
The DigiColiseum is a floating coliseum located outside of CITY that serves as a place for Light Fang and Night Claw to meet without unsanctioned conflict. The two organizations use it to hold tournaments and Tamer tests, which allow a Tamer to progress in rank by defeating other tamers or teams of Digimon. At the end of the game, a tournament is held which includes Tamers from the Next and Data Squad dimensions, as well.
Outside of the tournament arena itself, there are information desks where a Tamer can learn about Wi-Fi or battling, redeem Tamer Points for prizes, or even enter secret passwords for special treasures.
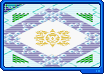
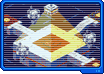
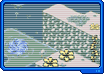
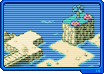
Access Glacier
Access Glacier (アクセスひょうが Akusesu-hyouga?) is a giant iceberg floating on the surface of Macro Sea. Large pipes connect the two areas, allowing travel between them.
In Digimon Story: Lost Evolution, it is connected to West City.
| Digimon | Games | After Quest | Level | EXP | Drops | |
|---|---|---|---|---|---|---|
| Da | Du | 39 | 70 |
|||
| Da | Du | 39 | 73 |
|||
| Da | Du | 40 | 71 |
|||

|
Da | Du | 40 | 76 |
||
| Da | Du | 41 | 74 |
|||

|
Da | Du | 41 | 75 |
||

|
Da | Du | 42 | 71 |
||
| Da | Du | 43 | 75 |
|||
| Da | Du | 44 | 141 |
|||

|
Da | Du | 45 | 145 |
||

|
Da | Du | 45 | 159 |
||

|
Da | Du | 46 | 151 |
||
| Da | Du | Stop the Duel (Da:HoQ07/Du:DaQ07) | 48 | 185 |
||
| Da | Du | Stop the Duel (Da:HoQ07/Du:DaQ07) | 48 | 187 |
||

|
Da | Du | The Combat Game (Da:AqQ07/Du:MaQ07) | 54 | 297 |
|

|
Da | Du | Gaia Origin Challenge (Da:UQ11/Du:UQ11) | 70 | 4000 |
Speed Chip γ |
| A colored background means that the Digimon can be found in this location in the specified game. A white background with a colored letter means that the Digimon cannot be found here. | ||||||
Chaos Brain
The Chaos Brain is Grimmon's domain.
Chip Forest
Highlight Haven
Limit Valley
Login Mountain
Login Mountain (ログインマウンテン Roguin Maunten?) is a location.
This is where the first quest in Digimon World Dawn takes place. Aquilamon is considered the "boss" of this area. It is the first area in the game with random encounters.
In Digimon Story: Lost Evolution, the Login Mountain is located on the north of the MotheBo Continent, and has a DigiShip port named Login Port (ログインポート Roguin Pōto?). It is where the Devimon DigiPlate is.
Loop Swamp
Macro Sea
Magnet Mine

Palette Amazon
Process Factory
Proxy Island
Resistor Jungle
Shadow Abyss

\
Sunken Tunnel
Sunken Tunnel is a dark, smelly place where only a few species of Digimon live.
This is where the first quest in Digimon World Dusk takes place. Raremon is considered the "boss" of this area. It is the first area in the game with random encounters.
Task Canyon
Thriller Ruins
Transfield
Transfield is a hidden area with four different environments (mountain, jungle, island, and ruins), as well as a central chaos area that serves as a thoroughfare. It is filled with powerful Digimon of all eight families, most of them at the Mega level, and it serves as the home base of the Gaia Origin, a group of Digimon that are more powerful than any others in the Digital World. After Koh or Sayo defeat the Chrono Core, the Gaia Origin extends them an invitation to duel with them and prove their worth.
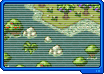
Digimon Story: Lost Evolution
MotheBo Continent in Lost Evolution.
GraBo Continent in Lost Evolution.
Although set in a different universe, most of the areas in this game are using the same name and/or design as those in Digimon World Dawn/Dusk. Old/unmodified areas are not shown here.
MotheBo Continent
MotheBo Continent (マザボたいりく Mazabo-tairiku?), like the American continents, has a northern continent and a southern continent.
DigiBase
The DigiBase (デジベース DejiBēsu?) is located in the northwestern part of the MotherBoard Continent. It is the base of operations for Agumon, Gabumon, Terriermon, Lopmon, Patamon, Renamon, Gatomon, and Calumon.
It has an Entrance Room (エントランスルーム Entoransu Rūmu?), a Yggdra Room (イグドラルーム Igudora Rūmu?), a Private Room (プライベートルーム Puraibēto Rūmu?), a Digi-Lab, and a DigiShip port named Base Port (ベースポート Bēsu Pōto?). The DigiBase Front (デジベースフロント DejiBēsu Furonto?) is connected to Heritage Cape, Patch Prairie and Packet Coast.
Heritage Cape
Heritage Cape (ヘリテージみさき Heritēji-misaki?) is the first place Shuu/Kizuna, Agumon, Hiroyuki, and Asuka arrive after entering the Digital World.
Patch Prairie
Patch Prairie (パッチプレーリー Pacchi Purērī?) is a location.
Packet Coast
Packet Coast (パケットコースト Paketto Kōsuto?) is a location. It is near Login Mountain.
Login Mountain
North Marine
North Marine (ノースマリン Nōsu Marin?) is the underwater path between Packet Coast and Loop Swamp. It has the same design as the "Macro Sea".
Loop Swamp
Loop Swamp (ループぬま Rūpu-numa?) is a location.
Shadow Hell
Shadow Hell (シャドウヘル Shadou Heru?) is a location.
Label Forest
North Cave
The underground link between Chip Forest and Palette Amazon.
Tamer Town
Tamer Town (テイマータウン Teimā Taun?) is a city where Shuu/Kizuna can buy new items, enter passwords or conduct wireless connection.
Palace Laboratory
Same design as "Highlight Heaven."
Union Room
An area inside the Palace Laboratory. Same design as "Sunshine City Union Room."
South Cave
The underground link between Resistor Jungle, Pixel Desert and Shadow Abyss.
Pixel Desert
Pixel Desert (ピクセルさばく Pikuseru Sabaku?) is a location.
GraBo Continent
Grabo Continent (グラボたいるき Gurabo-tairiku?) is a continent located in a different Server than MotheBo Continent, and as such it is a different world. All the 4 cities on this continent are located in the right middle of 4 different adventure areas.
Task Port N
Task Port N (タスクポートN Tasuku Pōto N?) is a DigiShip port connected GraBo Cave and Wizard Temple.
GraBo Cave
Grabo Cave (グラボケイブ Gurabo Keibu?) is a location.
Wizard Temple
Wizard Temple (ウィザードテンプル Wizādo Tenpuru?) is a location.
East City
Located inside the Task Canyon, this is the third city area where higher-class items and farm goods could be bought.
South City
Located inside the Thriller Ruins, this is a city full of Numemon.
Access Glacier
West City
North City
GraBo Marine
GraBo Central
Risk Factory
Same design as "Process Factory."
Class Desert
Clone Mine
Same design as "Magnet Mine"
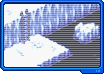
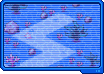
Digimon Story: Super Xros Wars Blue and Red
The Digital World in Blue and Red.
LS-tou Zone
The LS-tou Zone (エルエストウゾーン Eruesutou Zōn, lit. "Legend-Swords-Island Zone"?) is an area where special beings referred to as Legend-Arms inhabit.
Fort Yard
Sky Fort
Knuckle Coast
Roundabout Amazon
Dark Tunnel
Flower Meadow
Skull Iceberg
Spider Nest Ruin
Papyrus Desert
Tokona Coast
Tokona Sea
Crystal Cave
Crystal Mine
Crystal Volcano
Stealth Valley
Lost Space
Digital Space
See also
| Worlds | |
|---|---|
| Real World: | Japan (Tokyo) | Gorgeous Knight | Gunslinger |
| Digital Worlds: | Adventure (File Island, Internet, Kernel, Dark Area) | Brave Tamer | Tamers | Frontier | Swan World | Data Squad | Fusion | Next | New Digital World | World 3 | Story | Cyber Sleuth | Witchelny | Iliad | Cocytus | Adventure: | Ghost Game |
| Others: | Dark Ocean | World of dreams | DigiQuartz | Never-Ever Land | Cyberspace EDEN | Net Ocean | AR-Field |