(→Trivia: not the correct way to cover that) |
(Undo revision 602614 by KrytenKoro (talk) shouldve just rename image to fix naming convention) Tag: Undo |
||
| (10 intermediate revisions by 4 users not shown) | |||
| Line 1: | Line 1: | ||
| + | {{cleanup|rewrite tenses and in-universe}} |
||
{{Infobox VG| title = Digimon Adventure 02: Tag Tamers |
{{Infobox VG| title = Digimon Adventure 02: Tag Tamers |
||
|image = [[File:Digimonadv02 wscboxboxart 160w.jpg]] |
|image = [[File:Digimonadv02 wscboxboxart 160w.jpg]] |
||
| Line 8: | Line 9: | ||
|genre = {{w|console role-playing game|RPG}} |
|genre = {{w|console role-playing game|RPG}} |
||
|modes = {{w|Single player|Single player}} |
|modes = {{w|Single player|Single player}} |
||
| − | |ratings = |
+ | |ratings = |
|platforms = {{w|WonderSwan|WonderSwan}} |
|platforms = {{w|WonderSwan|WonderSwan}} |
||
|media = {{w|Cartridge (electronics)|Cartridge}} |
|media = {{w|Cartridge (electronics)|Cartridge}} |
||
| Line 17: | Line 18: | ||
[[File:Omegamon.jpg]] |
[[File:Omegamon.jpg]] |
||
[[File:Tag Tamers.jpg]] |
[[File:Tag Tamers.jpg]] |
||
| − | [[File: |
+ | [[File:Millenniummon.jpg]] |
[[File:WarGreymon2.jpg]] |
[[File:WarGreymon2.jpg]] |
||
[[File:Ken&Ryo.jpg]] |
[[File:Ken&Ryo.jpg]] |
||
[[File:MetalGarurumon.jpg]] |
[[File:MetalGarurumon.jpg]] |
||
==Story== |
==Story== |
||
| + | [[Ryo Akiyama]] visits [[Ken Ichijouji]] in his room, where they witness Diaboromon's defeat by {{c|Omnimon|a}} on the Internet, and {{c|Veemon|a}} appears from the computer with a [[D-3]] for Ryo. There is another [[Diaboromon]] loose in the Digital World, and Ryo was called in to defeat it. Ken followed along, only to be left behind in [[Primary Village]] with Taichi and Agumon to wait for Ryo's return. The Diaboromon, hiding out where {{c|Devimon|a}} used as his base, was easily defeated with just Veemon's strength. {{c|Millenniummon|a}} showed up soon after to reveal that he was waiting for Ryo and that the Diaboromon was simply a lure used to draw Ryo back into the Digital World. He blew up the mountain, and in doing so, ripped the Digital World into two. From then on, the story's point of view switched between Ryo and Ken. |
||
| + | Ken woke up in a forest clearing to meet his digimon partner, {{c|Wormmon|a}}. Ken searched for Ryo at first, but Wormmon took him to [[Gennai]], who told him that Ryo was on the other half of the world. During this, Gennai said that they must set up a mirror site, and that Ken is a Chosen Child. But he doesn't want to be a Chosen Child, Ken says. Only after Wormmon guilt-tripped him did Ken accept. Ken was then told to clear out the beach side of the continent, where he picked up the pieces of {{c|Digi-Egg|Armor}}s, cleared several dungeons taking the form of a ziggurat, an Egyptian pyramid, a Mayan pyramid, and a Black Ship. Once he returned from his mission, Gennai and {{c|Piximon|a}} set up a [[Reload Machine]] that would allow Ryo and Ken to contact each other and share items. The scene switched to Ryo, who must follow on Ken's path and jump ahead to another dungeon to clear. Thus the name, Tag Tamers. |
||
| − | The game started off with [[Ryo Akiyama|Ryo]] visiting [[Ken Ichijouji]] in his room. They witnessed Diaboromon's defeat by [[Omnimon]] on the Internet, and [[Veemon]] (at a later point in time to be Davis's Veemon) appeared from the computer with a [[D-3]] for Ryo. There was another [[Diaboromon]] loose in the Digital World, and Ryo was called in to defeat it. Ken followed along, only to be left behind in [[Primary Village]] with Taichi and Agumon to wait for Ryo's return. The Diaboromon, hiding out where [[Devimon]] used as his base, was easily defeated with just Veemon's strength. [[Millenniumon]] showed up soon after to reveal that he was waiting for Ryo and that the Diaboromon was simply a lure used to draw Ryo back into the Digital World. He blew up the mountain, and in doing so, ripped the Digital World into two. From then on, the story's point of view switched between Ryo and Ken. |
||
| + | After many battles, [[DNA Digivolutions]], and archaeological digs for more Digi-Egg pieces, Ryo eventually arrived at Millenniummon's floating continent. Millenniummon chuckled and said that he could not be defeated by just one power. The key to his power cannot be unraveled, and the door will never be opened. He then disappeared, and a single locked door turned up outside of Primary Village. Back at base, Piximon said that Millenniummon still had several traps on Ken's side of the world, so the scene switched to Ken. |
||
| − | Ken woke up in a forest clearing to meet his digimon partner, [[Wormmon]]. Ken searched for Ryo at first, but Wormmon took him to [[Gennai]], who told him that Ryo was on the other half of the world. During this, Gennai said that they must set up a mirror site, and that Ken is a Chosen Child. But he doesn't want to be a Chosen Child, Ken says. Only after Wormmon guilt-tripped him did Ken accept. Ken was then told to clear out the beach side of the continent, where he picked up the pieces of [[Digi-Egg (Armor)|Digi-Eggs]], cleared several dungeons taking the form of a ziggurat, an Egyptian pyramid, a Mayan pyramid, and a Black Ship. Once he returned from his mission, Gennai and [[Piximon]] set up a [[Reload Machine]] that would allow Ryo and Ken to contact each other and share items. The scene switched to Ryo, who must follow on Ken's path and jump ahead to another dungeon to clear. Thus the name, Tag Tamers. |
||
| + | Along the route to Millenniummon's dungeon, an [[Elecmon]] told Ken that the locked door led to Millenniummon's heart, then wonders if Millenniummon has a heart at all. In a sharp contrast to his more polite interaction with Ryo, Millenniummon was outright rude to Ken and insulted him before disappearing. |
||
| − | After many battles, [[Digivolution#DNADigivolution|DNA Digivolutions]], and archaeological digs for more Digi-Egg pieces, Ryo eventually arrived at Millenniumon's floating continent. Millenniumon, speaking in archaic Japanese, chuckled and said that he could not be defeated by just one power. The key to his power cannot be unraveled, and the door will never be opened. He then disappeared, and a single locked door turned up outside of Primary Village. Back at base, Piximon said that Millenniumon still had several traps on Ken's side of the world, so the scene switched to Ken. |
||
| + | The key to the locked door was the completed [[Digi-Egg of Desire]], which only reacted to Ryo. Once it opened, Ryo, Ken, and their digimon were absorbed in darkness and taken to Millenniummon's world: a barren wasteland with a gigantic metallic sphere hovering over it. The sphere was Millenniummon's castle. Millenniummon welcomed Ryo warmly to the world created from his mind. To Ken, his voice dropped coldly as he said that everything that happened there happened also within him. Ken's power is limited there. Then he turned again to Ryo, chuckled, and invited them to challenge him, even though they trembled in despair. |
||
| − | Along the route to Millenniumon's dungeon, an [[Elecmon]] told Ken that the locked door led to Millenniumon's heart, then wonders if Millenniumon has a heart at all. In a sharp contrast to his more polite interaction with Ryo, Millenniumon was outright rude to Ken and insulted him before disappearing. |
||
| + | The battle that ensued destroyed Millenniummon's body, even as he laughed in his defeat. With Millenniummon's defeat, the [[Digital World]], Taichi and Agumon returned to their normal states. Then Millenniummon returned only to disperse his [[Dark Spores]]. Ken shoved Ryo out of the way of one, only to get it instead of Ryo. Millenniummon's spirit chuckled. He can never die, he said, and as Ryo's power is eternal, so is his. He then disappeared. |
||
| − | The key to the locked door was the completed [[Digi-Egg of Desire]], which only reacted to Ryo. Once it opened, Ryo, Ken, and their digimon were absorbed in darkness and taken to Millenniumon's world: a barren wasteland with a gigantic metallic sphere hovering over it. The sphere was Millenniumon's castle. Millenniumon welcomed Ryo warmly to the world created from his mind. To Ken, his voice dropped coldly as he said that everything that happened there happened also within him. Ken's power is limited there. Then he turned again to Ryo, chuckled, and invited them to challenge him, even though they trembled in despair. |
||
| + | In the scene afterwards, Wormmon said that Ken became sick and increasingly cold to him. The epilogue was meant to show Ken's eventual fall into the Kaiser persona a year later, and in it Ken said that he was different from Millenniummon. He was the [[Digimon Emperor]]. |
||
| − | The battle that ensued destroyed Millenniumon's body, even as he laughed in his defeat. With Millenniumon's defeat, the [[Digital World]], Taichi and Agumon returned to their normal states. Then Millenniumon returned only to disperse his [[Dark Spores]]. Ken shoved Ryo out of the way of one, only to get it instead of Ryo. Millenniumon's spirit chuckled. He can never die, he said, and as Ryo's power is eternal, so is his. He then disappeared. |
||
| + | == Gameplay == |
||
| − | In the scene afterwards, Wormmon said that Ken became sick and increasingly cold to him. The epilogue was meant to show Ken's eventual fall into the Kaiser persona a year later, and in it Ken said that he was different from Millenniumon. He was the [[Digimon Emperor]]. |
||
| + | The main bulk of the game focuses on exploring dungeons. With Dungeons consisting of multiple rooms with either a battle, a treasure chest, a store or a digimon to converse with. Conversing with Digimon will always result in receiving tips, unless speaking with {{c|MagnaAngemon|a}}, who will always heal your party or {{c|Ogremon|a}}, who will always attack your party with a group of at least Champion-Level digimon. The Dungeons can split into two parallel corridors with different amount or rooms and room contents.<!-- Adding a picture of one of the maps would help explain this. --> |
||
| + | During the Exploration of Dungeons Ryo and Ken can find special Digi-Egg pieces. Given enough Digi-Egg pieces a Digi-Egg can be repaired in {{c|Centarumon|a}}'s store and equipped onto a Digimon as Armor. Equipped Digi-Eggs can either serve as guards against specific status effects or activate special Digivolutions. These are special Moves that digivolve the Digimon for one turn to deal high damage. |
||
| + | |||
| + | After defeating {{c|MetalGreymon|a}} Ryo activates {{c|Digitamamon|a}}'s Store, where Ryo can [[DNA Digivolve]] two Digimon, of at least Rookie level or higher, together. This results in a new Digimon at Fresh-Level with increased DNA Digivolution-Levels. Given a high enough DNA Digivolution-Level a Digimon can digivolve beyond Rookie. |
||
| + | |||
| + | Throughout the Campaign focus will switch between either Ken or Ryo's side of the story. Both sides have the same Map-Layouts and Dungeons but are populated by different Digimon. Each time the Story between the sides Ryo and Ken can trade up to three items and Digimon between them. This is the only way to receive specific Digimon for special DNA Digivolutions, such as {{c|Paildramon|a}}. |
||
| + | ==List of obtainable Digimon== |
||
| + | The following 228 Digimon can be found in the game. Bolded Digimon appear only as Digi-Egg Evolutions, a type of special move. |
||
| + | {| border="0" |
||
| + | | valign="top" | |
||
| + | *[[AeroVeedramon]] |
||
| + | *[[Agumon]] |
||
| + | *[[Airdramon]] |
||
| + | *[[Andromon]] |
||
| + | *[[Angemon]] |
||
| + | *[[Angewomon]] |
||
| + | *[[Ankylomon]] |
||
| + | *[[Scorpiomon]] |
||
| + | *[[Apocalymon]] |
||
| + | *[[Aquilamon]] |
||
| + | *[[Armadillomon]] |
||
| + | *[[Asuramon]] |
||
| + | *{{c|MegaKabuterimon|Red}} |
||
| + | *[[Babamon]] |
||
| + | *[[Bakemon]] |
||
| + | *[[Tapirmon]] |
||
| + | *[[Betamon]] |
||
| + | *[[BigMamemon]] |
||
| + | *[[Birdramon]] |
||
| + | *[[BlackWarGreymon]] |
||
| + | *[[Blossomon]] |
||
| + | *[[Boltmon]] |
||
| + | *[[Botamon]] |
||
| + | *[[Brachiomon]] |
||
| + | *[[Candlemon]] |
||
| + | *[[DemiVeemon]] |
||
| + | *[[Chibomon]] |
||
| + | *[[Kimeramon]] |
||
| + | *[[MetalKoromon]] |
||
| + | *[[Clockmon]] |
||
| + | *[[Kokatorimon]] |
||
| + | *[[Coelamon]] |
||
| + | *[[Cyclonemon]] |
||
| + | *[[Dragomon]] |
||
| + | *[[DarkTyrannomon]] |
||
| + | *[[SkullMeramon]] |
||
| + | *[[Deltamon]] |
||
| + | *[[Daemon]] |
||
| + | *[[Deramon]] |
||
| + | *[[Devidramon]] |
||
| + | *[[Devimon]] |
||
| + | *[[Diaboromon]] |
||
| + | *[[Digitamamon]] |
||
| + | *'''[[Digmon]]''' |
||
| + | *[[Dokugumon]] |
||
| + | *[[Drimogemon]] |
||
| + | *[[Ebidramon]] |
||
| + | *[[Elecmon]] |
||
| + | *[[Etemon]] |
||
| + | *[[Vilemon]] |
||
| + | *[[ExTyrannomon]] |
||
| + | *'''[[Flamedramon]]''' |
||
| + | *[[Flarerizamon]] |
||
| + | *[[Floramon]] |
||
| + | *[[Flymon]] |
||
| + | *[[Gabumon]] |
||
| + | *[[Crabmon]] |
||
| + | | valign="top" | |
||
| + | *[[Garbagemon]] |
||
| + | *[[Garudamon]] |
||
| + | *[[Garurumon]] |
||
| + | *[[Gazimon]] |
||
| + | *[[Gekomon]] |
||
| + | *[[Gesomon]] |
||
| + | *[[Giromon]] |
||
| + | *[[Gizamon]] |
||
| + | *[[Goblimon]] |
||
| + | *[[Goldramon]] |
||
| + | *[[Roachmon]] |
||
| + | *[[Golemon]] |
||
| + | *[[Gomamon]] |
||
| + | *[[Gorillamon]] |
||
| + | *[[Gotsumon]] |
||
| + | *[[Greymon]] |
||
| + | *[[Gryphonmon]] |
||
| + | *[[Guardromon]] |
||
| + | *[[Hagurumon]] |
||
| + | *[[Divermon]] |
||
| + | *[[Apemon]] |
||
| + | *[[Hawkmon]] |
||
| + | *[[HerculesKabuterimon]] |
||
| + | *[[MagnaAngemon]] |
||
| + | *[[Magnadramon]] |
||
| + | *'''[[Halsemon]]''' |
||
| + | *[[Hououmon]] |
||
| + | *[[Ninjamon]] |
||
| + | *[[Ikkakumon]] |
||
| + | *[[Imperialdramon Fighter Mode]] |
||
| + | *[[Jagamon]] |
||
| + | *[[Jijimon]] |
||
| + | *[[Cherrymon]] |
||
| + | *[[Kabuterimon]] |
||
| + | *[[Kapurimon]] |
||
| + | *[[Centarumon]] |
||
| + | *[[KingEtemon]] |
||
| + | *[[Kiwimon]] |
||
| + | *[[Knightmon]] |
||
| + | *[[Kokuwamon]] |
||
| + | *[[Koromon]] |
||
| + | *[[Kunemon]] |
||
| + | *[[Kuwagamon]] |
||
| + | *[[LadyDevimon]] |
||
| + | *[[Leafmon]] |
||
| + | *[[Leomon]] |
||
| + | *[[Lillymon]] |
||
| + | *'''[[Magnamon]]''' |
||
| + | *[[Mamemon]] |
||
| + | *[[Mammothmon]] |
||
| + | *[[MarineAngemon]] |
||
| + | *[[MarineDevimon]] |
||
| + | *[[Mekanorimon]] |
||
| + | *[[Megadramon]] |
||
| + | *[[MegaSeadramon]] |
||
| + | *[[Meramon]] |
||
| + | *[[MetalEtemon]] |
||
| + | | valign="top" | |
||
| + | *[[MetalGarurumon]] |
||
| + | *[[MetalGreymon (Vaccine)]] |
||
| + | *[[MetalGreymon (Virus)]] |
||
| + | *[[MetalMamemon]] |
||
| + | *[[MetalSeadramon]] |
||
| + | *[[MetalTyrannomon]] |
||
| + | *[[Millenniummon]] |
||
| + | *[[Minomon]] |
||
| + | *[[Minotarumon]] |
||
| + | *[[Motimon]] |
||
| + | *[[Mojyamon]] |
||
| + | *[[Mokumon]] |
||
| + | *[[Monochromon]] |
||
| + | *[[Monzaemon]] |
||
| + | *[[Moon=Millenniummon]] |
||
| + | *[[Machinedramon]] |
||
| + | *[[Musyamon]] |
||
| + | *[[Mushroomon]] |
||
| + | *[[Nanimon]] |
||
| + | *[[Datamon]] |
||
| + | *'''[[Nefertimon]]''' |
||
| + | *[[Numemon]] |
||
| + | *[[Nyaromon]] |
||
| + | *[[Nyokimon]] |
||
| + | *[[Octomon]] |
||
| + | *[[Ogremon]] |
||
| + | *[[Omnimon]] |
||
| + | *[[Okuwamon]] |
||
| + | *[[Otamamon]] |
||
| + | *[[Pagumon]] |
||
| + | *[[Paildramon]] |
||
| + | *[[Palmon]] |
||
| + | *[[Patamon]] |
||
| + | *'''[[Pegasusmon]]''' |
||
| + | *[[Penguinmon]] |
||
| + | *[[DemiMeramon]] |
||
| + | *[[Phantomon]] |
||
| + | *[[Piximon]] |
||
| + | *[[Pichimon]] |
||
| + | *[[DemiDevimon]] |
||
| + | *[[Piedmon]] |
||
| + | *[[Puppetmon]] |
||
| + | *[[Biyomon]] |
||
| + | *[[Plesiomon]] |
||
| + | *[[Poromon]] |
||
| + | *[[Poyomon]] |
||
| + | *[[Salamon]] |
||
| + | *[[Bukamon]] |
||
| + | *[[Pumpkinmon]] |
||
| + | *[[Punimon]] |
||
| + | *[[Pururumon]] |
||
| + | *[[Yokomon]] |
||
| + | *'''[[Raidramon]]''' |
||
| + | *[[Raremon]] |
||
| + | *[[RedVegiemon]] |
||
| + | *[[Deputymon]] |
||
| + | *[[Rosemon]] |
||
| + | | valign="top" | |
||
| + | *[[Dolphmon|Rukamon]] |
||
| + | *[[SaberLeomon]] |
||
| + | *[[Seadramon]] |
||
| + | *[[Seraphimon]] |
||
| + | *[[Shakkoumon]] |
||
| + | *[[Syakomon]] |
||
| + | *[[Shellmon]] |
||
| + | *[[ShimaUnimon]] |
||
| + | *'''[[Shurimon]]''' |
||
| + | *[[SkullGreymon]] |
||
| + | *[[SkullMammothmon]] |
||
| + | *[[SkullSatamon]] |
||
| + | *[[Snimon]] |
||
| + | *[[Soulmon]] |
||
| + | *[[Starmon]] |
||
| + | *[[Stingmon]] |
||
| + | *'''[[Submarimon]]''' |
||
| + | *[[Sukamon]] |
||
| + | *[[Silphymon]] |
||
| + | *[[Gatomon]] |
||
| + | *[[Tanemon]] |
||
| + | *[[Tankmon]] |
||
| + | *[[Tentomon]] |
||
| + | *[[Togemon]] |
||
| + | *[[Tokomon]] |
||
| + | *[[ShogunGekomon]] |
||
| + | *[[Tortomon|Tortamon]] |
||
| + | *[[ToyAgumon]] |
||
| + | *[[Triceramon]] |
||
| + | *[[Tsubumon]] |
||
| + | *[[Tsunomon]] |
||
| + | *[[Tuskmon]] |
||
| + | *[[Tyrannomon]] |
||
| + | *[[Unimon]] |
||
| + | *[[Upamon]] |
||
| + | *[[Vademon]] |
||
| + | *[[Valkyrimon]] |
||
| + | *[[Myotismon]] |
||
| + | *[[Veedramon]] |
||
| + | *[[Vegiemon]] |
||
| + | *[[VenomMyotismon]] |
||
| + | *[[Vikemon]] |
||
| + | *[[Veemon|V-mon]] |
||
| + | *[[WarGreymon]] |
||
| + | *[[WaruMonzaemon]] |
||
| + | *[[WereGarurumon]] |
||
| + | *[[Whamon]] |
||
| + | *[[Wizardmon]] |
||
| + | *[[Woodmon]] |
||
| + | *[[Wormmon]] |
||
| + | *[[ExVeemon]] |
||
| + | *[[Yanmamon]] |
||
| + | *[[Frigimon]] |
||
| + | *[[YukimiBotamon]] |
||
| + | *[[Yuramon]] |
||
| + | *[[Zudomon]] |
||
| + | *[[Zurumon]] |
||
| + | |} |
||
==References== |
==References== |
||
*[http://www.mobygames.com/game/wonderswan/digimon-adventure-02-tag-tamers http://www.mobygames.com/game/wonderswan/digimon-adventure-02-tag-tamers] |
*[http://www.mobygames.com/game/wonderswan/digimon-adventure-02-tag-tamers http://www.mobygames.com/game/wonderswan/digimon-adventure-02-tag-tamers] |
||
| Line 47: | Line 291: | ||
[[Category:2000 Video Games]] |
[[Category:2000 Video Games]] |
||
[[Category:WonderSwan games]] |
[[Category:WonderSwan games]] |
||
| − | [[Category:Digimon video games]] |
||
| − | [[Category:Games]] |
||
Latest revision as of 01:03, 13 June 2023
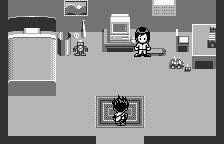
Screenshots[]

Story[]
Ryo Akiyama visits Ken Ichijouji in his room, where they witness Diaboromon's defeat by Omnimon on the Internet, and Veemon appears from the computer with a D-3 for Ryo. There is another Diaboromon loose in the Digital World, and Ryo was called in to defeat it. Ken followed along, only to be left behind in Primary Village with Taichi and Agumon to wait for Ryo's return. The Diaboromon, hiding out where Devimon used as his base, was easily defeated with just Veemon's strength. Millenniummon showed up soon after to reveal that he was waiting for Ryo and that the Diaboromon was simply a lure used to draw Ryo back into the Digital World. He blew up the mountain, and in doing so, ripped the Digital World into two. From then on, the story's point of view switched between Ryo and Ken.
Ken woke up in a forest clearing to meet his digimon partner, Wormmon. Ken searched for Ryo at first, but Wormmon took him to Gennai, who told him that Ryo was on the other half of the world. During this, Gennai said that they must set up a mirror site, and that Ken is a Chosen Child. But he doesn't want to be a Chosen Child, Ken says. Only after Wormmon guilt-tripped him did Ken accept. Ken was then told to clear out the beach side of the continent, where he picked up the pieces of Digi-Eggs, cleared several dungeons taking the form of a ziggurat, an Egyptian pyramid, a Mayan pyramid, and a Black Ship. Once he returned from his mission, Gennai and Piximon set up a Reload Machine that would allow Ryo and Ken to contact each other and share items. The scene switched to Ryo, who must follow on Ken's path and jump ahead to another dungeon to clear. Thus the name, Tag Tamers.
After many battles, DNA Digivolutions, and archaeological digs for more Digi-Egg pieces, Ryo eventually arrived at Millenniummon's floating continent. Millenniummon chuckled and said that he could not be defeated by just one power. The key to his power cannot be unraveled, and the door will never be opened. He then disappeared, and a single locked door turned up outside of Primary Village. Back at base, Piximon said that Millenniummon still had several traps on Ken's side of the world, so the scene switched to Ken.
Along the route to Millenniummon's dungeon, an Elecmon told Ken that the locked door led to Millenniummon's heart, then wonders if Millenniummon has a heart at all. In a sharp contrast to his more polite interaction with Ryo, Millenniummon was outright rude to Ken and insulted him before disappearing.
The key to the locked door was the completed Digi-Egg of Desire, which only reacted to Ryo. Once it opened, Ryo, Ken, and their digimon were absorbed in darkness and taken to Millenniummon's world: a barren wasteland with a gigantic metallic sphere hovering over it. The sphere was Millenniummon's castle. Millenniummon welcomed Ryo warmly to the world created from his mind. To Ken, his voice dropped coldly as he said that everything that happened there happened also within him. Ken's power is limited there. Then he turned again to Ryo, chuckled, and invited them to challenge him, even though they trembled in despair.
The battle that ensued destroyed Millenniummon's body, even as he laughed in his defeat. With Millenniummon's defeat, the Digital World, Taichi and Agumon returned to their normal states. Then Millenniummon returned only to disperse his Dark Spores. Ken shoved Ryo out of the way of one, only to get it instead of Ryo. Millenniummon's spirit chuckled. He can never die, he said, and as Ryo's power is eternal, so is his. He then disappeared.
In the scene afterwards, Wormmon said that Ken became sick and increasingly cold to him. The epilogue was meant to show Ken's eventual fall into the Kaiser persona a year later, and in it Ken said that he was different from Millenniummon. He was the Digimon Emperor.
Gameplay[]
The main bulk of the game focuses on exploring dungeons. With Dungeons consisting of multiple rooms with either a battle, a treasure chest, a store or a digimon to converse with. Conversing with Digimon will always result in receiving tips, unless speaking with MagnaAngemon, who will always heal your party or Ogremon, who will always attack your party with a group of at least Champion-Level digimon. The Dungeons can split into two parallel corridors with different amount or rooms and room contents.
During the Exploration of Dungeons Ryo and Ken can find special Digi-Egg pieces. Given enough Digi-Egg pieces a Digi-Egg can be repaired in Centarumon's store and equipped onto a Digimon as Armor. Equipped Digi-Eggs can either serve as guards against specific status effects or activate special Digivolutions. These are special Moves that digivolve the Digimon for one turn to deal high damage.
After defeating MetalGreymon Ryo activates Digitamamon's Store, where Ryo can DNA Digivolve two Digimon, of at least Rookie level or higher, together. This results in a new Digimon at Fresh-Level with increased DNA Digivolution-Levels. Given a high enough DNA Digivolution-Level a Digimon can digivolve beyond Rookie.
Throughout the Campaign focus will switch between either Ken or Ryo's side of the story. Both sides have the same Map-Layouts and Dungeons but are populated by different Digimon. Each time the Story between the sides Ryo and Ken can trade up to three items and Digimon between them. This is the only way to receive specific Digimon for special DNA Digivolutions, such as Paildramon.
List of obtainable Digimon[]
The following 228 Digimon can be found in the game. Bolded Digimon appear only as Digi-Egg Evolutions, a type of special move.
References[]
- http://www.mobygames.com/game/wonderswan/digimon-adventure-02-tag-tamers
- Tag Tamers FAQ
- Syldra.net Gaming Diary